Replacing a Ceph OSD within a Proxmox Hyperconverged Setup
Table of Contents
Notice
- Always back up your data before making any changes.
- In my case, I’m running a homelab with 3 nodes, each with 1 OSD, so we need to be especially careful.
Prerequisites
Depending on your CRUSH rule and how data is distributed in your cluster, requirements may vary.
In my example, I’m using 3 nodes with 3 OSDs total, each 1 TB in size. I want to increase capacity by replacing each disk with a larger one.
Before removing any OSD, make sure the remaining 2 OSDs can hold all data currently in the cluster. Once that’s confirmed, you can safely proceed.
Replacing an OSD
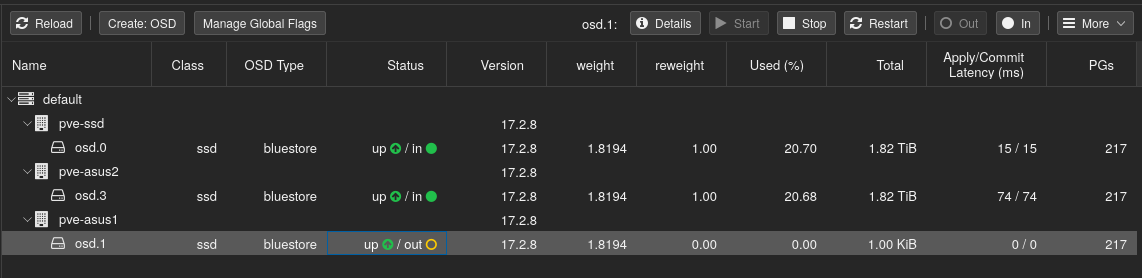
Step 1: Mark the OSD as “Out”
I started by marking the OSD I wanted to replace as “Out”.
This tells Ceph to stop storing new data on it and begins rebalancing its contents to the remaining OSDs.
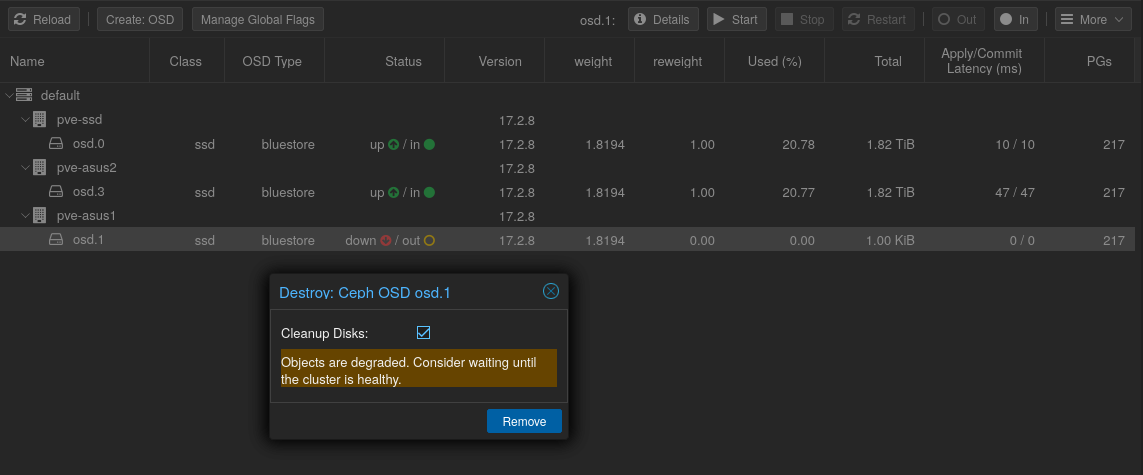
Step 2: Stop and Destroy the OSD
Once the rebalancing is complete, stop the OSD, then destroy it via the “More → Destroy” option.
If you leave “Cleanup Disks” checked, the disk will be ready for reuse in Proxmox without any manual cleanup.
Step 3: Physically Replace the Disk
This step is straightforward:
Shut down the node, physically swap the disk, and power it back on.
Step 4: Add the New Disk as an OSD
Once the node is back online with the new disk installed, add it to the Ceph cluster as a new OSD.
This process is the same as adding any other OSD during initial setup.
After adding the OSD, Ceph will begin rebalancing data across the cluster automatically.
Tip: I tested marking the next OSD as “Out” while rebalancing was still in progress. It worked without issues, but be aware that doing so may increase the load on your cluster—proceed at your own risk.

Step 5: Rinse and Repeat
Once the rebalancing is complete, go back to Step 1 and repeat the process for the next disk.
Afterthoughts
I successfully replaced all disks in my cluster, upgrading from 1 TB to 2 TB drives.
Even with a minor hiccup—shutting down the wrong Proxmox node and replacing the wrong disk—it turned out fine. No data was lost, and the process remained smooth throughout.
💡 Additional Tip (Out of Context but Handy)
If you’re using distributed storage (like Ceph) with Proxmox, it’s a good idea to set a “Start on boot delay” of 5–10 seconds for each node.
This helps ensure that shared storage is fully available before virtual machines or containers try to start.
You can configure this in Proxmox under:Node → System → Options → Start on boot delay